
Blog, Daily Life, DIY, Image & Styling, Styling Tricks
#DIY Halloween Costume Ideas! 10 Steps to Create YOUR OWN!

Nov
I absolutely LOVE Halloween! No not because of the scary things or what the holiday represents, but because it is a chance to dress up to be anything you want to be! Ever since I was a little girl I loved being able to use my creativity to come up with a costume idea and then use my fashion skills to actually create it! In a way I was forced to since my parents wouldn’t ever spend the money to buy us a costume so we had to be inventive.
This year I had the opportunity to help my bf’s daughter with her costume. She wanted to be a Zombie High School Student. So we started brainstorming and the process began!
Step 1: Look online for an image of something you want to emulate (not to copy exactly because your costume will be ORIGINAL and so much better! This was ours.

Step 2: Think about what you have in your closet already that can be used for the look. In this case she already had a pretty floral skater skirt, some black tights, and black combat boots.
Step 3: Start creating the missing pieces. We needed a top so we went to the Michael’s craft store to see what we could find
Step 4: We purchased our supplies which included; 
-1 plain white t-shirt
-Heat transfer paper
-Fabric spray paint in red color
-Rhinestone chain trim
-Pink satin ribbon 1” wide
-Rhinestone heat transfer trim
-Hot glue gun and glue
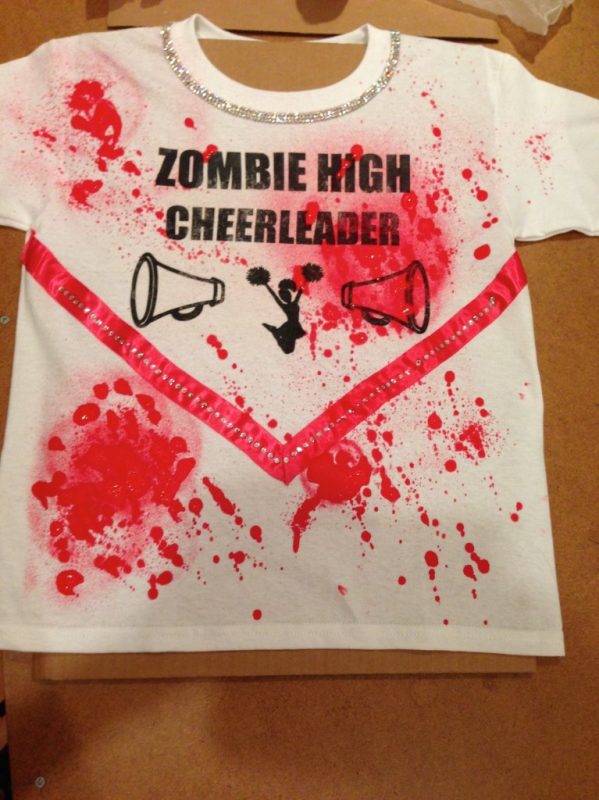
Step 5: Create a printed design for the front & back of the shirt, print it on the heat transfer paper, and iron on the shirt following the instructions (Make sure to follow the instructions and hold iron down for the amount of time it suggests so that the print comes completely off the paper)

Step 6: Attach all the trims. I stitched the pink ribbon down in a ‘V’ shape, then ironed on the heat transfer rhinestone trim on top of the ribbon, and used some hot glue to add the rhinestone chain around the neckline

Step 7: Add the blood. TIP- Make sure to put a piece of cardboard in-between the layers of the shirt so that the blood doesn’t bleed through to the other side. Do one side at a time, wait for it to dry, and then do the other side. Also do some practice sprays before you actually do it on the shirt so that you can see how much blood you want to put. I did a small amount at first, waited for it to dry, and then added some more. You can always add more but you can’t take any away 

Step 8: Fray the edges of the sleeves and shirt hem with a scissors. We also added holes to her leggings as well
Step 9: Purchase any accessories or makeup items to complete the look. We opted for some scary face makeup!
Step 10: Put it all together and Voila! Zombie Cheerleader! Doesn’t she look awesome!
Comment below and tell me of a time you made your own costume and what you were!!!
Share this blog and share the love <3 <3 <3 <3 <3 <3 <3 <3

For more FREE fashion biz tips, join our Fearless Fashionpreneur Facebook Page and subscribe below!
Like this post?
Sign up to get more like it